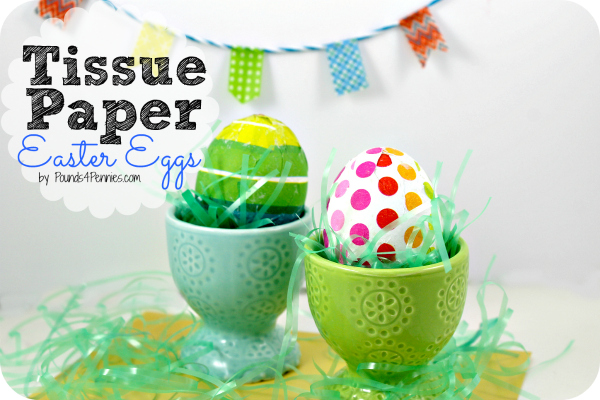
Bright and colorful Easter eggs are so much fun to make. A basket filled with brightly colored eggs is so pretty. Tissue paper Easter eggs are so easy to make and can be decorated so colorfully to fill any Easter basket. I am sure the items used to make this craft are already in your crafting or gift wrapping area. Part of the joy of hunting eggs is also see the beautiful designs. I think making tissue paper Easter eggs is easier than dyeing the eggs.
Tissue Paper Easter Eggs
Materials to make Tissue Paper Easter Eggs

1 Tablespoon water
1 Tablespoon flour
Paintbrush
Colorful tissue paper
Pencil for marking
Scissors
Directions for Tissue Paper Easter Eggs
1. First boil and dry your eggs.
2. Mix the flour and water to form a paper mache paste. You can add a little more water or a little more flour as needed. This mixture just needs to be spreadable. Allow to sit for about 5 to 10 minutes to allow the flour to break down to form a really great paste.
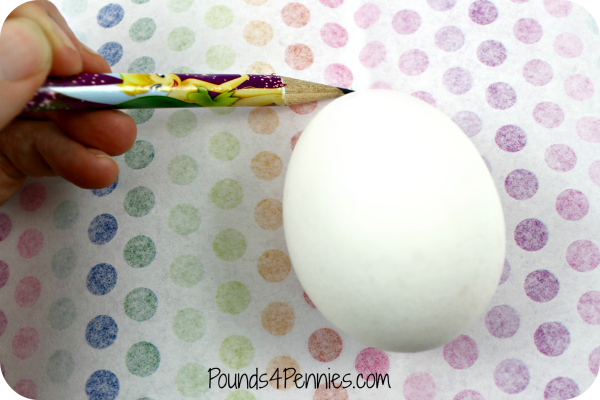
3. While you are waiting for that to set up a little, place your egg on the tissue paper. Using a pencil mark on the wrong side of the tissue paper the top and bottom of the egg. Add about 1/4 of an inch to the top and bottom to allow the tissue paper to mold around the egg. Roll the egg to see how much tissue paper you will need to go around the entire egg.

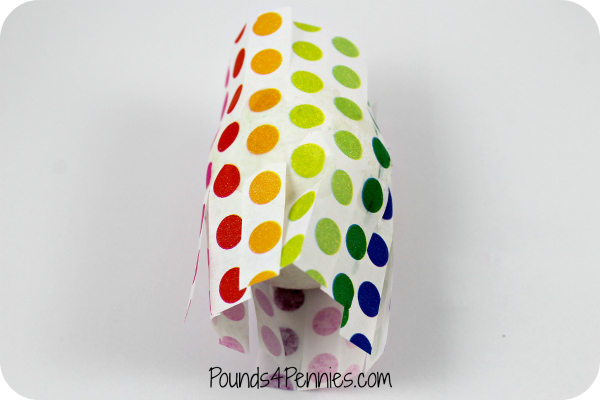
4. Cut out the tissue paper from the measurements. Next cut small slits at the top and bottom to allow the paper to be molded around the egg to decorate it. Each egg needs to be measured and cut individually. No two eggs are exactly the same.
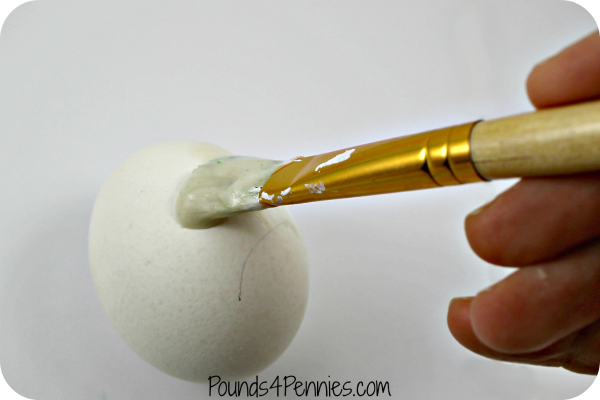
5. Next gently paint the flour and water mixture over the egg. A nice med coat works the best.

Wrap the tissue paper around the center of the egg first, then slowly press the tissue paper to the top allowing the slits to fold in nicely at the top. Next do the same for the bottom. Allow to dry.
6. In order to keep the bright, pretty tissue paper decorations on the egg, do not apply a top coat of the flour and water mixture. There should be enough mixture on the egg for the tissue paper to stick.

The colors on these tissue paper Easter eggs are so vibrant with this craft. I am just absolutely in love with them. We have a tradition to hide one golden egg at Easter. This egg has a special prize or money inside. There is always a race to see who will find the golden egg each year.
More Easter ideas:
How to make an Easter basket like a pro
Ham and cheese muffin cups – Great for leftover ham
Monte Cristo Casserole – Another leftover ham recipe
Find more Easter crafts ideas to make. Follow me on Pinterest for more holiday ideas or like my Facebook page for more simply living ideas.
What Easter egg traditions do you have in your family?

These are my kinds of eggs. Not sure I can convince the kids, though, to forgo dyeing in place of Mod Podge! Very pretty and colorful. Visiting from Best of the Weekend party.
I love how these turned out. Super cute and easy. I love easy! Thanks for sharing!
Amy, Very creative and looks like fun to do too! Thanks so much for sharing with us this week at Brag About it! Pinned to share.
Such a cute idea. Thanks for sharing at the #InspirationSpotlight Party. Pinned & Shared. I’ll have to be on the hunt for cute tissue papers.
Great alternative from using dyes. I think my girls would love to make these! Thanks for sharing at Funtastic Friday!