The kombucha second fermentation process is the magical process where kombucha turns to bubbly soda. This is the best part in my own personal opinion. It turns into soda with bubbles with and easy kombucha recipe. When people are trying to replace their soda addiction, kombucha bubbly effervescence tea hit the spot. The flavor possibilities are endless to satisfy your soda needs.
Kombucha Second Fermenation

(affiliate links have been used throughout this post to make it easy for you to get the correct supplies)
Supplies needed for kombucha second fermentation process
1 gallon brewed homemade kombucha
6 16oz glass bottles and lids or bottles that seal
1/2 cup juice of your choice
Ginger (if you like ginger flavor)
1 plastic funnel
2 cup glass measuring cup
Directions how to make kombucha recipe
The second fermentation of homemade kombucha is really easy. First make sure everything is sterilized. I like to run everything through the dishwasher with high temp dry. I know all my utensils are clean. Let everything cool to room temperature before starting the bottling process. Learn to grow kombucha scoby from scratch and remove the scoby from your batch of homemade kombucha to a cooled, clean sanitized dish.
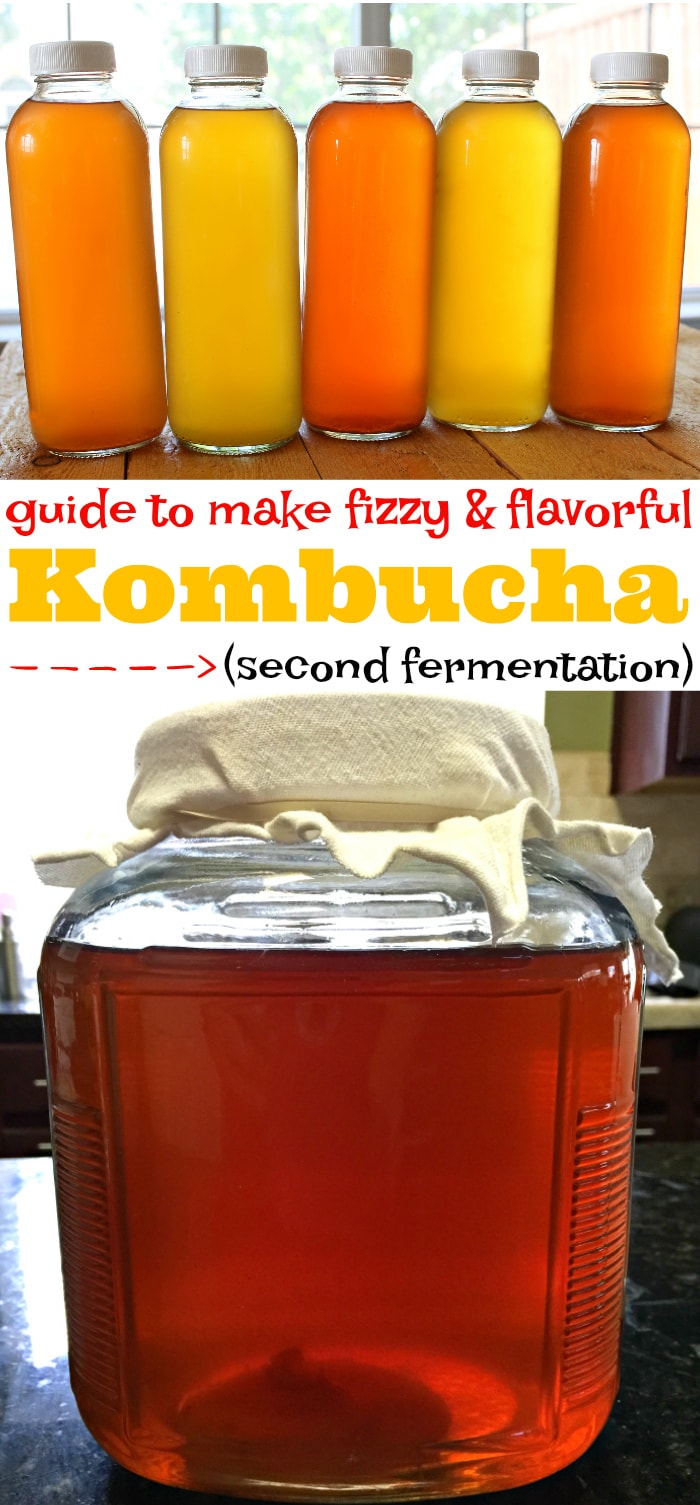
Next, set up the bottles to make it easy to pour. I use old sterilized kombucha bottles and bottles that have their own seal. I just found this amazing kombucha jar with a valve you can make a large batch in. Pro tip: place the bottles on a hand towel to minimize clean up of spills.
Next add about 2 tablespoons of juice for added flavor for this kombucha recipe. Feel free to mix the flavor up a bit using lemon, ginger, strawberries or blueberries. Put the berries in a blender and strain to just get the juice. This is my favorite part, since I can come up with a bunch of my favorite flavor combinations for a kombucha recipe, or you can just leave plain flavor kombucha.
Next pour the kombucha into the bottles. If you can pour the kombucha directly into the bottles, that is best. I gently pour the first fermentation into a 4 cup measuring pitcher. Then I pour into my glass jars and seal really well with lids. If you do not have a measuring pitcher, carefully pour into the glass jars using a funnel. This was just too messy for me. I do all of this pouring over the sink to keep it simple with little clean up as possible. Remember to keep 2 cups of this first fermentation to my your next batch of homemade kombucha.
Now let the flavored kombucha rest in you favorite dark place for 2 – 7 days. It just depends on how fizzy you like it. I don’t like mine really fizzy, so I just leave it there overnight. Then place in the fridge and open and drink to enjoy. My first batch usually has quite a bit of bubbles to start with, so it doesn’t need to rest long.
Kombucha Second Fermentation Process

Homemade Kombucha Second Fermentation Recipe
Get the full guide to kombucha second fermentation process for the amazing bubbles. Find out tips and tricks to make a homemade kombucha recipe fizzy, bubbly kombucha you will love.
Ingredients
- 1 gallon brewed homemade kombucha
- 6 16 oz glass bottles and lids or 3 1 liter bottles with caps
- 1/2 cup juice of your choice
- Ginger if you like ginger flavor
- 1 plastic funnel
- glass measuring cup
Instructions
-
The second fermentation of homemade kombucha is really easy. First make sure everything is sterilized. I like to run everything through the dishwasher with high temp dry. I know all my utensils are clean. Let everything cool to room temperature before starting the bottling process. Remove the precious scoby grown from scratch from your batch of homemade kombucha to a cooled, clean sanitized dish.
-
Next set up the bottles to make it easy to pour. Pro tip: place them on a hand towel to minimize clean up of spills.
-
Next add about 2 tablespoons of juice for added flavor. Feel free to mix it up a bit using lemon, ginger, strawberries or blueberries. Put the berries in a blender and strain to just get the juice. This is my favorite part, since I can come up with a bunch of my favorite flavor combinations. Or you can just leave plain.
-
Next pour the kombucha into the bottles. If you can pour the kombucha directly into the bottles is best. I gently pour the first fermentation into a 4 cup measuring pitcher. Then I pour into my glass jars and seal really well with lids. If you do not have a measuring pitcher, carefully pour into the glass jars using a funnel. This was just too messy for me. I do all of this pouring over the sink to keep it simple with little clean up as possible.
-
Now let the flavored kombucha rest on the counter top for 2 – 7 days. It just depends on how fizzy you like it. I don’t like mine really fizzy, so I just leave it there overnight. Then place in the fridge and open to enjoy. My first batch has quite a bit of bubbles to start with.
Why Drink Kombucha
Kombucha has become my soda substitute since I have decreased my sugar intake. It is just sweet enough, but not too sweet. This is a terrific drink to make after you have decreased your sugar intake when going on a clean eating lifestyle change. Adding the juices and flavorful herbs helps make kombucha taste even better. This is my go to drink in the afternoons and at dinner. It is recommended to only drink 16oz a day.
How do you flavor your kombucha?

Hmm…I’ve never heard of Kombucha Soda but it sounds interesting – thanks for sharing the recipe and joining in on last weeks Creative K Kids’ linky party! If you haven’t already, don’t forget to join us this week!
I used Irish black tea for my first ferment, but it looks so dark. Does it matter how strong the tea is? Do you even have to use tea? Can the first ferment just be water and sugar, then add the juice for the 2nd fermentation?
Great questions Julia. Yes you must use tea. That is how the scoby is fed and how the bacteria is fed. Tea is a key ingredient for kombucha. You should use at least 5 small tea bags per gallon for the best kombucha.
I’m in the second stage of growing kombucha scoby from your instructions using the bottled kombucha method and I’m so excited! I love kombucha but don’t like the price so this is very exciting to be able to make my own. Thank you for your detailed instructions! I’ll be back if I have any questions.
That is fantastic Cathy. I am so glad this worked out for you. You now have new skills from quarantine time! Pleas share pictures on Facebook or Instagram and tag #mainlyhomemade. I would love to see them.
Just about to make my first gallon and starting a baby scoby from a store bought bottle again as a back up. Can I combine scobies at some point?
Great question Sara. You can try, but I have found that the scoby’s will not grow together.
Is there any risk of mold when you add juice, and leave it at room temp for a few days? Even with washing the glassware at high temps, isn’t there still possible contaminants in the air? I don’t think anyone would drink juice left out that long by itself. Perhaps the first fermentation helps clean that up? TIA.