Who doesn’t love pizza? Whenever I say the word pizza, I swear my kids (even the big ones) start jumping up and down. I have found pizza does not pack well for lunch, so I wanted to make my own Homemade Pizza Pockets for school lunches and quick snacks.
The best part about these little pizza pockets is they freeze really well and only take one minute to heat up in the microwave. How cool is that? This is a huge win for this mom. This recipe makes two batches, so I made one cheese and one pepperoni. We made our own homemade pepperoni this year and it tastes awesome.
Homemade Pizza Pockets

Ingredients for Homemade Pizza Pockets
1 batch of homemade pizza dough
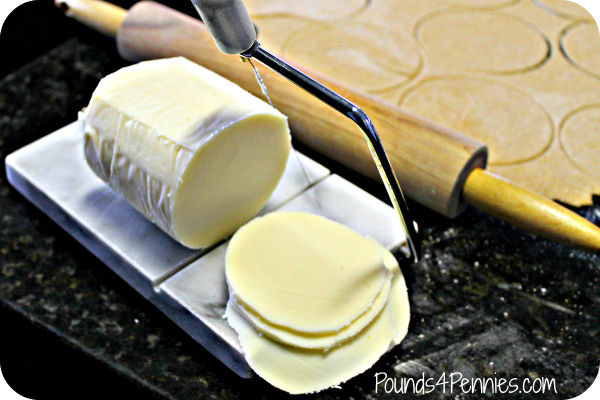
1/2 pound mozzarella cheese
3 oz pepperoni or any toppings you would love
1 cup tomato sauce
Directions on How to Make Homemade Pizza Pockets
1. Make a batch of homemade whole wheat pizza dough to start. It is great to make a batch of dough and freeze to have ready to go when you want to make pizza pockets or pizza rolls.
2. Take half of the dough and roll it out. It is ok to roll the dough a little thin for these. They taste better when the dough is a little thinner.
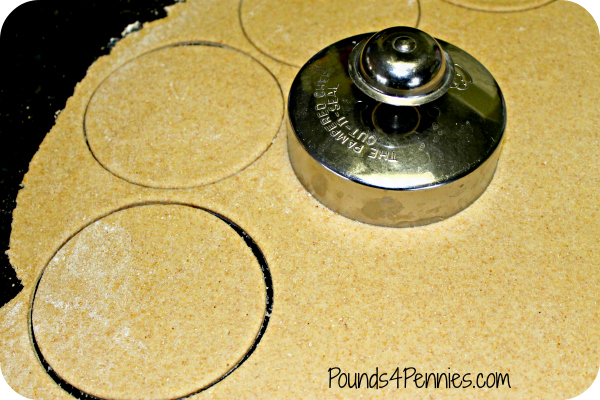
3. Take a round pie maker, mine was a gift but here is a similar one. Cut out as many circles in the whole wheat dough as possible.
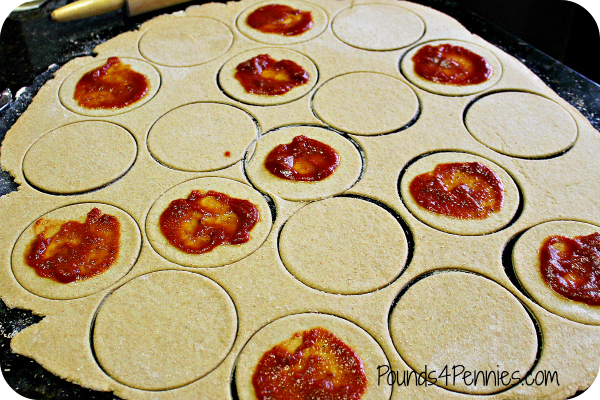
4. Next place about a table spoon of sauce on the circles. Then place a slice of mozzarella cheese on top of the sauce and lastly add some pepperoni. These can be filled with whatever toppings you love on your pizza. Let your imagination run wild. However, since these were for the kids, I just kept it simple.
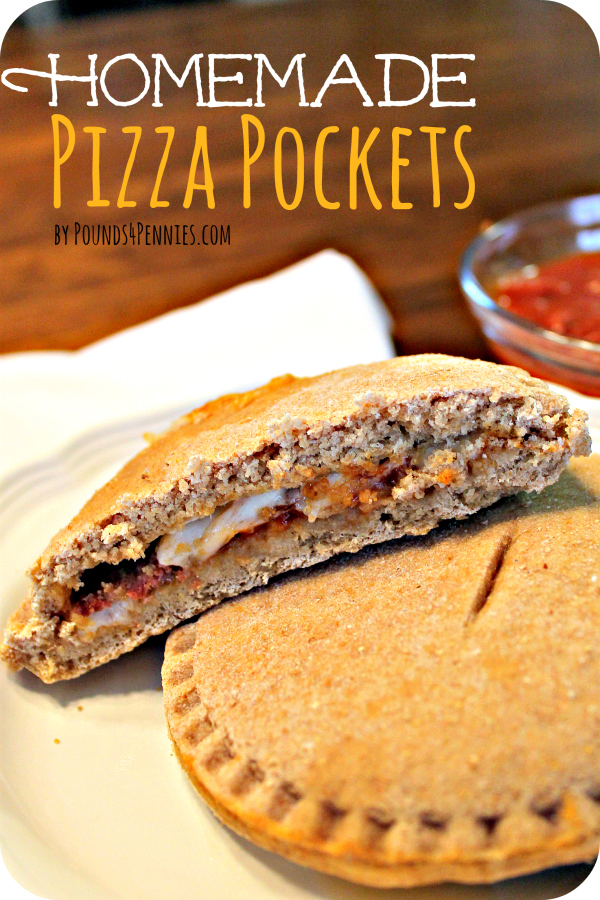
5. Not take the halves with no toppings and place on top. Line them up and press using the whole press. For a better stick, wet the edges to seal. I didn’t do this and they turned out great. After the first batch is made, roll out the second batch to make more.
6. Place on a pizza stone or lined cookie sheet and bake in a 400 degree oven for about 12 minutes or until dough is fully cooked. They are ready to eat right then or you can freeze them for snacks later.
7. Freezer tip: After they have cooled, place them in a freezer safe container and freeze. Whenever the hunger monster arises with your kids, simply place one pizza pocket in the microwave for about one minute. These pizza pockets come out perfect every time.

Easy Homemade Pizza Pockets Recipe
Homemade Pizza Pockets are made from a simple homemade pizza dough recipe filled with pizza fillings of your choice.
Ingredients
- 1 batch of homemade pizza dough
- 1/2 pound mozzarella cheese
- 3 oz pepperoni or any toppings you would love
- 1 cup tomato sauce
Instructions
-
Make a batch of homemade whole wheat pizza dough to start. It is great to make a batch of dough and freeze to have ready to go when you want to make pizza pockets or pizza rolls.
-
Take half of the dough and roll it out. It is ok to roll the dough a little thin for these. They taste better when the dough is a little thinner.
-
Take a round pie cutter, mine was a gift but here is a similar one. Cut out as many circles in the whole wheat dough as possible.
-
Next place about a table spoon of sauce on half of the circles. Then place a slice of mozzarella cheese on top of the sauce and lastly add some pepperoni. These can be filled with whatever toppings you love on your pizza. Let your imagination run wild. However, since these were for the kids, I just kept it simple.
-
Not take the halves with no toppings and place on top. Line them up and press using the whole press. For a better stick, wet the edges to seal. I didn't do this and they turned out great. After the first batch is made, roll out the second batch to make more.
-
Place on a pizza stone or lined cookie sheet and bake in a 400 degree oven for about 12 minutes or until dough is fully cooked. They are ready to eat right then or you can freeze them for snacks later.
-
F
-
reezer tip:
-
After they have cooled, place them in a freezer safe container and freeze. Whenever the hunger monster arises with your kids, simply place one pizza pocket in the microwave for about one minute. These pizza pockets come out perfect every time.
We like to serve them with a little extra sauce or some homemade ranch dressing to dip. My kids just love these homemade pizza pockets and want them all the time. I am glad to know these are a much healthier option than the ones at the store. Homemade pizza pockets are easy to pack for school lunches, too. Making these is a great way to incorporate some fun family time in the kitchen. We enjoy cooking together as a family. Take a look to find more my Homemade Recipes and follow my Recipes Pinterest board for more inspiration.
What filling would you put in your homemade pizza pockets?

This looks so yummy Amy!
YUM! So glad I stumbled across your blog… sitting here drooling over all your wonderful pictures and recipes. Stopping by from THe Girl Creative – would love for you to stop by my baking blog to say hello! x
I’m licking my lips right now! Looks so good! Pinned and tweeted. We truly appreciate you taking the time to be a part of our party. Please stop by and party with us again. The party starts Monday at 7 pm and ends on Friday at 7 pm. Happy Sunday! Lou Lou Girls