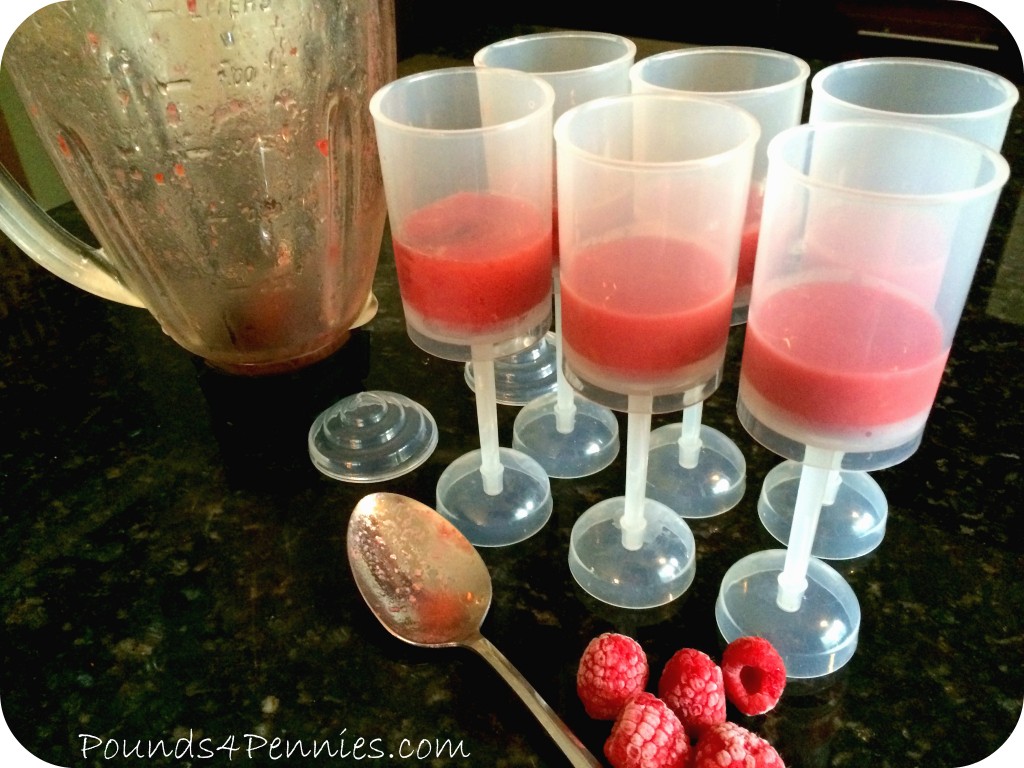
There is nothing better than frozen treats to celebrate any occasion. You can usually get a great deal on berries during the summer months to make these frozen treats. This treats really are very easy to make, just takes a little patients on waiting for each layer to freeze. I love to make homemade all natural treats for my kids to enjoy during the hot summer months. I would rather provide them with something to nourish their bodies rather than something filled with colored water and sugar. There are so many ways to freeze berries and fruit for wonderful frozen treats this summer. Stick around I will have plenty more healthy frozen treat ideas to share with you throughout this hot summer season.

Ingredients for Red, White and Blue Frozen Treats
Red Layer
1/2 cup Strawberries
1/2 cup Raspberries
1/2 cup Red Juice (Pick a sweet 100% juice)
White Layer
1 Banana
1 Teaspoon Lemon juice (prevent the banana from browning)
1/2 Cup Plain Yogurt
2 Tablespoons Honey
Blue Layer
1 Cup Blueberries
a Splash of dark Juice
Directions How to Make Berry Frozen Treats

1. You will need a blender for this recipe. Place the ingredients for the red layer in the blender. Frozen berries are OK to use to help speed the freeze time. More juice may be needed if using frozen berries. Blend the berries on the setting blend until completely smooth. A little honey can be added if these are too tart for your taste.
2. Place about two heaping tablespoons full into each push pop mold. Eat anything that is left over. Freeze for at least two hours. This is the hardest part waiting for them to freeze. Don’t tell the kids you are making these, unless you like them asking you every five minutes “Are they ready yet, mom?” “NO!”
3. This layer is pretty much like the first step, but this time with bananas, yogurt, lemon and honey. Blend them up and place two tablespoons of the banana yogurt mixture on top of the red layer. Wait again for two more hours or so.
4. You will never guess, but the third layer is like the first layer but with blueberries and juice. Again blend until smooth and place two tablespoons on top or fill the container with the remainder.
5. Once they are all frozen the kids can enjoy. A good tip to remember is there should be a little more than a cup for each level of push pop, if not add a little more berries or juice to make up the difference.

You can make these six frozen treats for just pennies, if you wait for the berries to go on sale. Freeze them and you can whip these little treats up in no time. These are perfect to make and celebrate the up coming red, white and blue holidays like Memorial Day and 4th of July. Are you looking for more frozen treats this summer? Try my frozen fruit Healthy Slushies for a quick and easy treat this summer treat for kids.
What are your favorite frozen treats for summer?

I don`t have kids but I`ll make this amazing sweet treat for myself. I just love these kind of things. I really think that the hard part are those 2 hours for every layer :))
Great thanks so much. I am glad you enjoyed them.
These are so cute! My kids are sitting next to me asking if they can have them.
This is a great idea. I’ve seen those push pop containers, and have wondered what to fill them with. This is fun, with lots of visual appeal for the kids – and SUPER healthy, too! YUMM! Thanks for the idea!