School is out and my kindergartener has brought home a box full of broken crayons.
What can you do with broken crayons?
We usually just dump them in another box of broken crayons for him to create his colorful masterpieces.
The small broken crayons never really get used, since no one can actually hold them. Not even his small little hands can hold a nub of a crayon. I hate to just throw things out. There is always a use for them, so I decided why not make new crayons. I didn’t want to turn on the oven during summer, so we made up a tray and left them in the sun and this is what happened.
Homemade Crayons
(affiliate links have been used throughout this post. I may receive a few pennies if you make a purchase.)
Supplies for Homemade Crayons
Broken left over crayons
Muffin Tin Liners (these are the ones I recommend)
Mini Muffin Tin
Sun
Directions on How to Make Homemade Crayons
1. First take off all the paper of the little nubs of crayons or find the little broken bits in your child’s school box. This is the most time consuming part, but I bet you have tons of unused crayons lying around your house. These colors want to be used too. Don’t throw them away repurpose them in to something new.
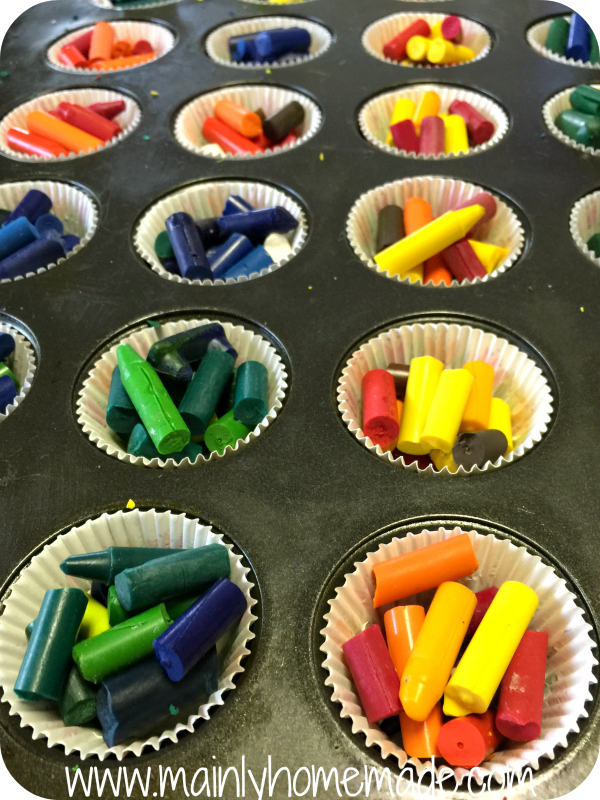
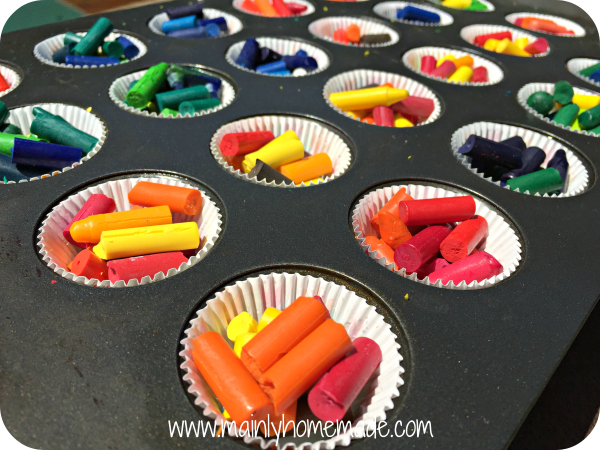
2. Next line a muffin tin like this one or mini muffin tin just like this one with two layers of muffin tin liners. The darker the pan the better. Also go for non stick for easy cleanup. I highly recommend muffin tin liners just like these. You will thank me later.
3. Fill the tin with all your little broken bits of crayons. I used blue and green for ocean colors and yellow, orange and red for the sun colors. Leave out in the sun during the middle of the day on a dark black surface for at least two hours in temperatures above 90 degrees. I really thought we would need hotter temperatures to melt the crayons. However, these melted in about 90 degree weather just fine. If they are not completely melted after two hour just leave them out there a little longer. This also is a fun science experiment to go check on them about every 15 minutes to see the progress.
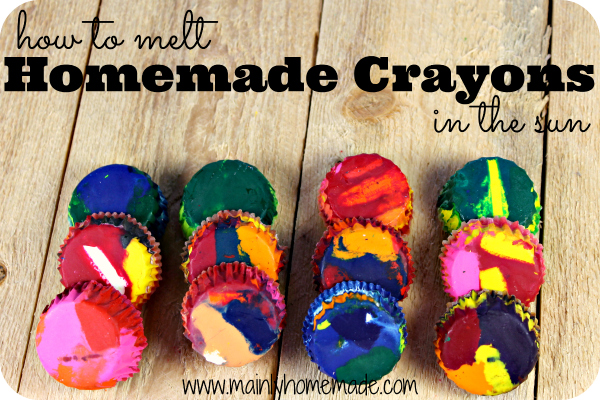
4. Bring inside to cool for about an hour or place the pan in the fridge for a few minutes to harden. Simply pop them out of the paper liners and color away. Or these are fun to give as gifts or party favors.

If you make these soon, tag me on social media with @MainlyHomemade or use the hashtag #mainlyhomemade. I would love to see what you create!

I love this! My kids don’t have too many destroyed crayons yet, but when we get them I’ll be sure to try this. Thankfully, here in Costa Rica I think I could make these year round.
Fun idea! I was wondering what I could do with all my extra little crayons.
Now I know what to do with all those crayon shards all over the place! Thanks for sharing! 🙂
Could we do oven on 150 degress?
You could try this. I have not done it. Please let me know how it turns out.
I just bought a huge box of used crayons for a few dollars. Many of them were broken, but I knew I could melt them to create new crayons. However I didn’t know that you could melt them in the sun. In south Georgia we get plenty of hot days so this summer I’ll be making them for the autistic children that I teach.
That sounds fantastic, Teresa. I am sure they will enjoy making these. Please tag me on Facebook, Twitter or Instagram, so I can see your creations!