Do you need to add a little more character to your front yard?
Our front yard is in pretty sad shape. So sad our large ash tree out front has died and we have had to remove it. I cried a little when they came to remove the large beloved tree from our front yard.
We have planted a small tree on the other side in our front yard, but our yard still needs some more character. I went looking in the dollar store the other day and I noticed they had the $1 solar lights out for spring. I just knew I could do something with these inexpensive lights. They are only a dollar and that is it. Since they are solar powered, no additional electric costs.
While looking around the dollar store, I found some round candle holders and some clear, flat glass marbles. I knew these things must just go together. So I set out to make a set of homemade glass globe solar outdoor lights for the front of our house. These are amazingly easy to put together and I just love how it spruces up our front yard.
Dollar Store Solar Garden Globe Light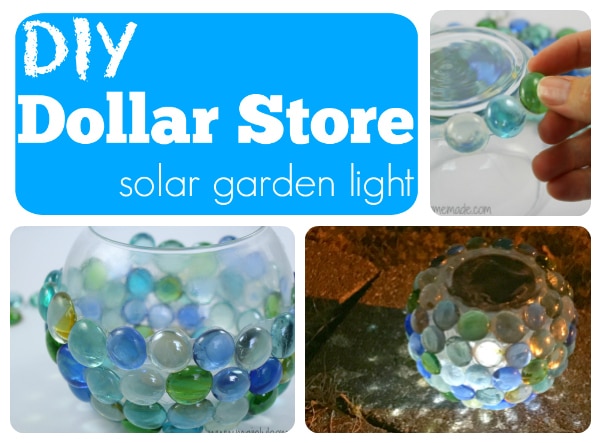
(affiliate links are used throughout this post. I may make a few pennies from your purchase)
Materials for Solar Garden Globe Light
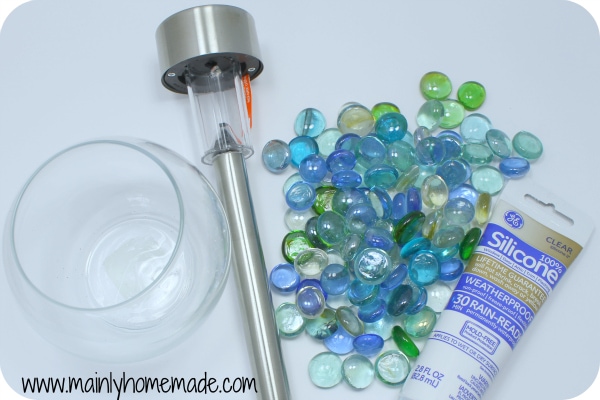
$1 store solar lights (or these lights will work)
$1 store Round candle vases
Flat glass marbles (found at the dollar store or like these marbles)
Silicone
Directions how to make DIY Dollar Store Solar Garden Globe Light
1. Clean the glass globes with some homemade glass cleaner to remove any oils or dirt that may be on the glass.
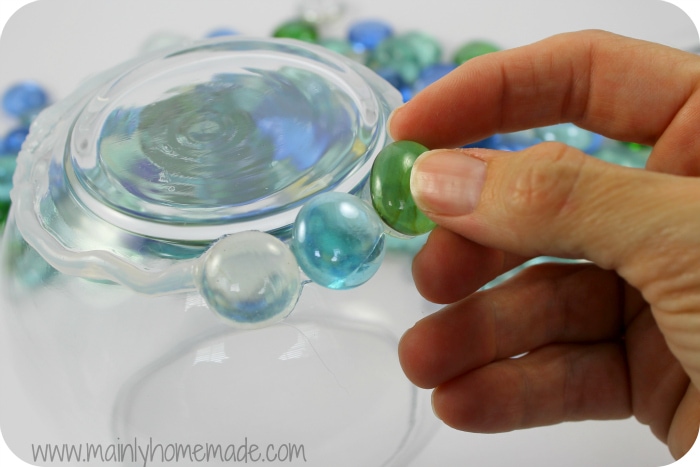
2. Starting at the bottom of the globe with it turned upside down, add a generous line of silicone about 1/2 inch from the bottom. I found starting at the bottom of the globe was easier to get the glass marbles to set in place correctly.
3. Firmly press flat glass marbles into the silicone and line the bottom of the glass globe. You can adjust here and there to find the perfect fit.
4. Once the bottom layer is set. Set it on the table for a few minutes to allow the silicone to set the glass stones in place.
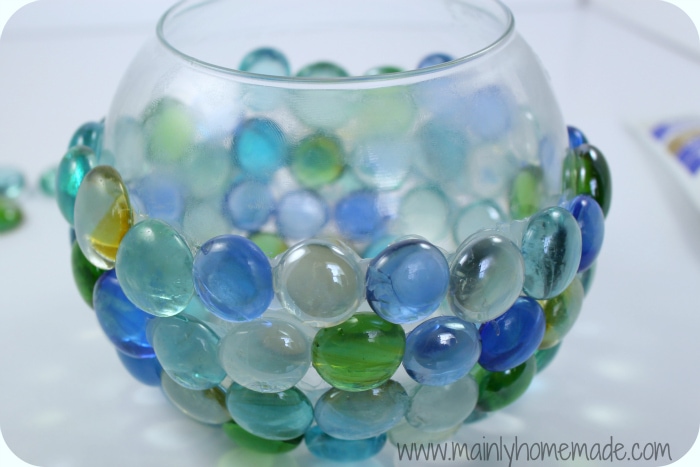
5. Add another layer of silicone about 1/2 inch from the first line of glass marbles. Repeat this process until the entire globe is completely covered in glass marbles. You may need a little more than one bag of glass marbles to complete one globe.
6. Allow silicone to dry over night.
7. Find the optimal spot for your solar outdoor lighting. Once you have the perfect spot push the solar light into the ground. Place a generous amount of silicone around the top of the solar light. Attach your marble covered globe to the top of the solar outdoor light. Now it is ready for your front yard.
Since the top of the globe is not covered it will allow enough light to charge the solar light during the day. This will provide hours of soft glowing light for our front yard. Although these solar lights are only a dollar. I have had some that have lasted more than two years. I just love how this adds little glowing bits of light in our front garden. I have placed these solar outdoor lights next to my painted ladybug rocks I made last year.
What is your favorite item you have made for your garden?

What a good idea!!
I wonder how some of this can be applied to a coach light – not on the bulb but on the outside glass itself.
I am sure this can be done on a coach light. I keep mine outside in the elements all the time. I have never had a glass marble fall off. If you try it, please share. I would love to see it!
I’m confused. How do you attach the bowl with the marbles. Or do you stick the light in the ground and just place the bowl over it??????
I did one with a bowling ball and love it, but want to do one with lights. Thank you
Thanks for your question. Place a small bead of silicone around the outside edge of the solar garden light, then place the bowl on top, then turn it upside down to dry. Let it dry for about a day. Then stick it in the ground. I hope this helps.
Does the solar light go inside an upside down marbled glass candle holder when gluing it to the solar light & the bottom of the marbled glass item is over the top of solar light? When you say to put & glue the glass marbled item on top of solar light it is vague as to the physical orientation of it.
Thanks for your question. If you see the picture of the solar light in the supplies, the solar panel is at the top. Place silicone on the top of the solar panel and glue it to the bottom of the glass globe. These solar lights are very small and they fit perfect in the globe. I just found some at Walmart yesterday for $0.97. They are not very bright, but provide a glow. I hope this answers your question.
Well done! I bought, $ store, solar lights yesterday. Already have the glass beads and I’ll use the glass jars I save. I just saw your lights. Serendipity!
Awesome! Please share on my Facebook page. I would love to see how yours turns out.
I love this idea! But I’m concerned about about the top that is left open. If I’m understanding the process right, the open bowl will have to be emptied after the rain. Thank you 😊
Thanks for your question Mary Ann. Actually the open part is the part you place on the ground. Since it is upside down, it will never fill with water. If you decide to make one I would love to see.
I have a question. I have several solar lite tops. the stake part is gone , broken off. I love this idea, but need suggestions on where and how to attach the solar lite
This would be a great solution. Just use silicone and attach the light to a glass jar.
Very good article! We are linking to this great post on our website.
Keep up the great writing.
Great idea I love it.
Hi Amy thank you for your DIY I’m definitely going to try this. Do you have a video of making this. I was checking your YouTube and didn’t see one. It would be helpful. Thanks again 🙂
Thanks for your question Nicole. I do not have a video of this. I am not doing much video at this time. I will add this to my possible videos for the future. Thanks for your recommendation.
Not understanding globe placement on solar light. Do you turn globe upside down then glue to light? So bottom of globe is facing up
Ty
Thanks for your question Cookie. Yes that is exactly correct.
How did you get the marbles to stay on the silicone? Mine keek sliding off the glass.
Thanks for your question Terra. Try using a little less silicone and you may have better luck.
What happens when the solar light quits? Is the globe hen unusable?
Great question Bev. It should last for several years. You can replace the battery in the solar light, or you can try to pry the light out to replace it. But I like to update my garden decor every few years anyway and this project is not too expensive.
Can you use E6000 instead of silicone?
You could try E6000. I found silicone super easy to work with for this project.
If the solar light is glued to the bottom of the bowl, then turn it upside down. How well does the solar light charge through the glass? Or will it?
Great question Kimmie. It charges really well. You want enough glue and press the solar light to where it is a very thin layer of glue. Be sure to leave in direct sunlight for the best charge.
Stones are slipping off glass. What am I doing wrong? Besides silicone I also tried using E6000
You need to let them set for a bit, or try using a little less silicone.
Wouldn’t it be a good idea to glue the stones to the inside of the bowl and then they’d never get weathered?! Maybe a little more time to do but one and done!
Great ideas you have! Love this!
Great idea Debbie! I have never thought of doing this. If you do please let me know how it turned out!